Sunday, October 29, 2017

NO BRUSH PAINTING COMPLETED!


This is where we left off on the last post.  I decided it needed a unifying tone, so I collaged a single sheet of tan tissue over the entire painting.  The second benefit is that I now have a surface that will take watercolor especially the wax paper with gesso on it.  I wanted to use watercolor for the transparent quality so I wouldn't lose the collage details.   


I added white gesso using a q-tip cotton swab for the highlighted areas. A little lumpy and clumsy but not too bad.


tool using ink.  I decided to try theI started to add color using watercolor sticks and then blending them out with several items.  I started with a makeup sponge but wasn't overly happy.   I saw a video where someone had used a tampon as a non-traditional mark making m out.  They make great blending tools and a way to apply even color over a large area.  What a great discovery!


The hands are very problematic!   The original collage paper is too dark and throwing off the values I need.  Using my finger, I applied more gesso to the hands giving me a better surface to add back color and make some subtle improvements on the drawing .


I thought I was finished but every time I photograph the work something jumps out at me that didn't register before.  Time for fine tuning!  The yellow behind the head on the left too strong and the white on the collar is the brightest spot on the page making it the focal point.  

I toned the entire background with quin gold...now it's too yellow.  Neutralized it with the compliment of purple, much better.  This has darkened the background, making the light shape on the right drawing too much attention.  Fixed that problem, toned down the color and called it a day!


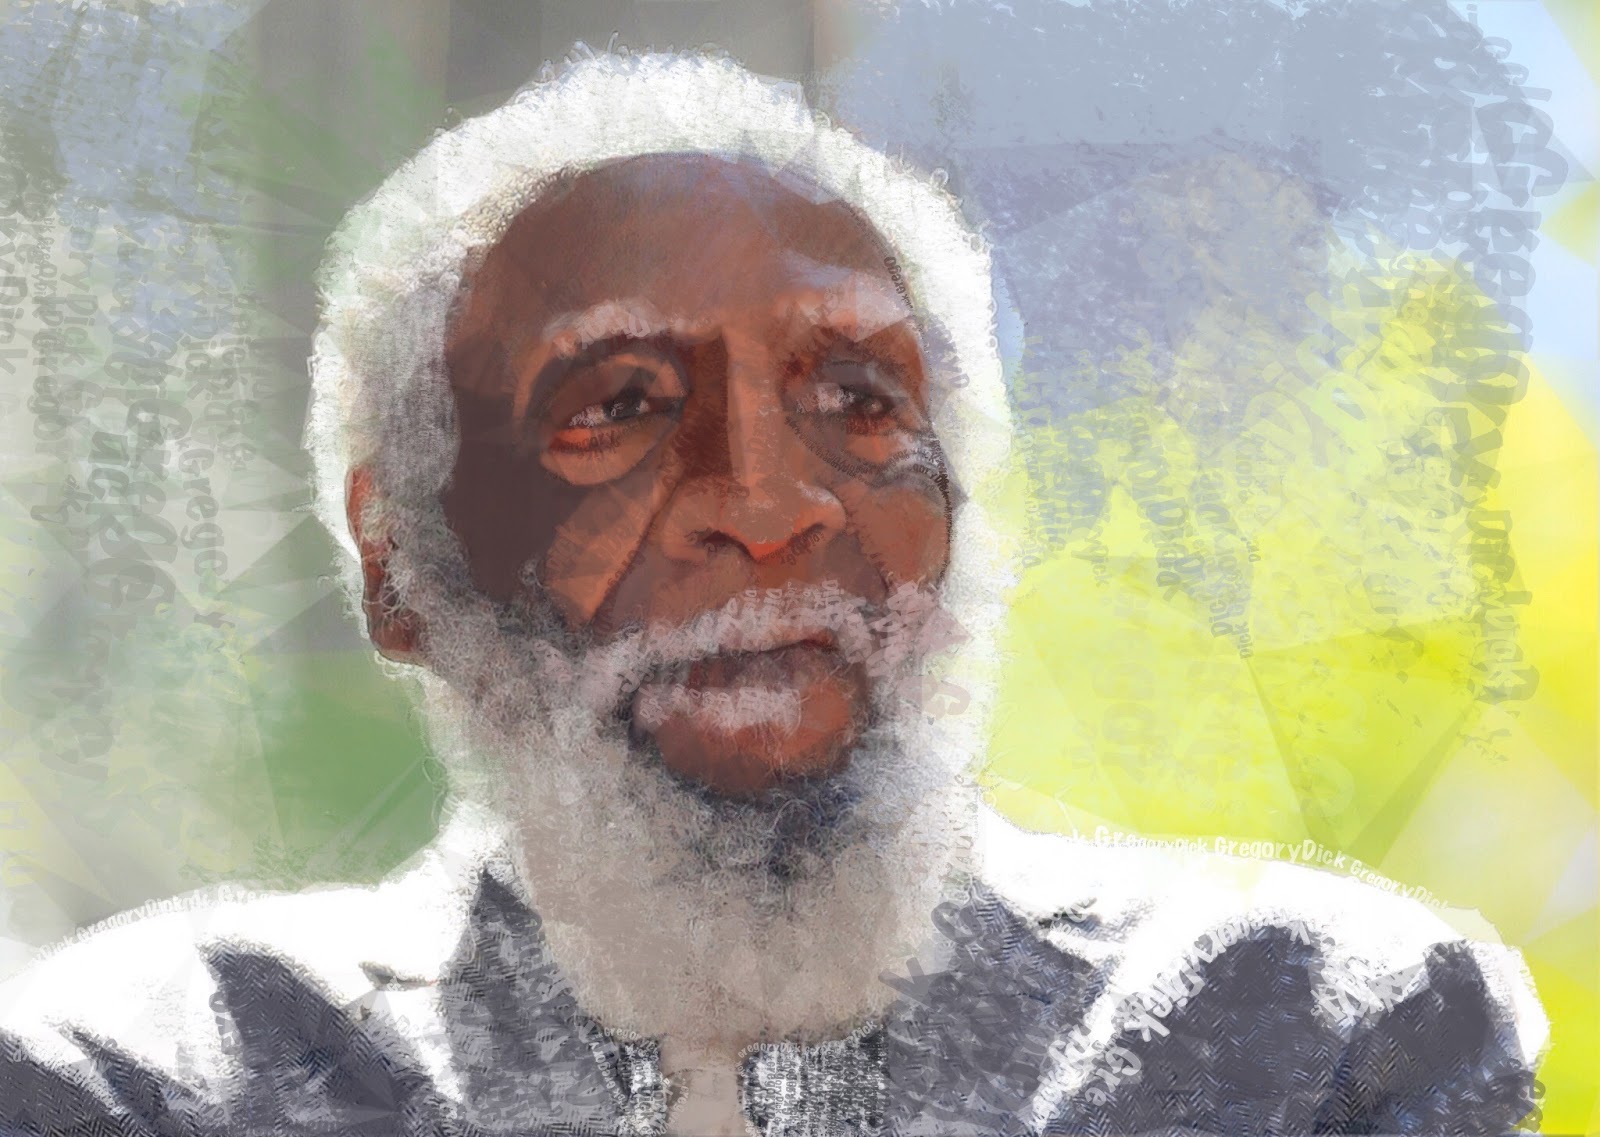
Here is the finished painting.  I found it impossible to photograph the color accurately in the studio.  I will have to take it outside to get away from artificial light.  

Just for fun here is the painting after the first start so you can see them side by side.


Sunday, October 22, 2017

BUILDING UP LAYER BY LAYER


This layer is collage, acrylic ink drawing and sponge roller painting.   Still not satisfying.


I added more collage papers including some gesso texture on waxed paper.  I was never sure if I could successfully collage waxed paper but it seems to work out okay.   Looking better.  I think a layer of tan tissue I collected for a dress shop might unify the image, but first I need to get my drawing back.


 I added more ink drawing done with a balsa wood stick.    Tomorrow, after tissue paper,  I will add some acrylic using my fingers.  Bought some thin latex type gloves so my hands won't be a disaster.  Finger painting will be lots of fun!

Tuesday, October 10, 2017

STEP ONE!

PAUL AT KITCHEN TABLE: DETAILED PENCIL DRAWING


I am excited about creating some new paintings to illustrate my latest workshop: Variatons 2.0.  In the original Variations workshop we changed the image using the Elements ofArt.   In this Variations workshop we are going to change the image by changing other ingredients such as surface, tools, emphasis and format. Any change will result in a new direction so chnaging things up adds exciement and discovery to your work.

For me, the first step is simplification.  I start with a detailed drawing from a photograph.  In this case I used a mechanical #2 lead pencil.  Then I put the photograph away and work from my drawing.   I like to draw with ink, over and over as I become familiar with my subject.  Putting in every detail is easy, a no brainer.  Simplification is difficult.   One has to make decisions and search out the most important aspects of the image that communicate your message to the viewer.

PAUL 2ND DRAWING, MODIFIED BLIND CONTOUR DRAWING IN PENCIL

 A quick way to get to the essence of the image is to draw with a mop string dipped in ink.   Fussy details are impossible with this drawing method.  I started out with the full image.  I wanted to hone in on some of the details like the head and hands so I did separate drawings of these elements.


  I found a feather in my collection of drawing materials and decided to see what kind of line I could get with the feather dipped in ink.   Then left handed drawing.  I now appreciate the difficulty of writing if you are left handed.  It seemed I was getting in my own way.  The feather was very interesting.  It will take lots of practice but I think it has promisse as an interesting tool.

FEATHER

FEATHER

FEATHER


  Tried using an eyedropper and then my "Oiler Boiler" needle bottle.  Tried both dominant right hand and awkward non-dominant left hand mostly continuous line drrawing.  I use newsprint sheets because they are large, cheap and I was able to purchase a ream of them.   Along the way, I decided the most important aspects of this image for me are pose, interlocked fingers of the hand, suspenders, eyebrows strong creases by side of nose and mouth and the chin.

EYE DROPPER 

OILER BOILER

OILER BOILER #2

OILER BOILER #3

OILER BOILER #4
A few more simplification drawings down to the bare essence and then I am ready to start a painting!

Thursday, September 21, 2017

REFRESHING MY MEMORY

JANUARY 20, 2017
 I am excited to be teaching a workshop about working on YUPO for the Pleasanton Art League in October.  I decided to refresh my techniques and explore more ideas to share.  This is an example I just finished using India Ink on YUPO.  You cover the paper with ink and then remove the lighter values to get the final result.  Every day for a week I recovered the page with ink at the end of the session because I wasn't satisfied with the result.   That is one of the best things about YUPO.  You can keep reworking, removing, reapplying, lifting, etc. without damaging the paper.  I love that the paper doesn't buckle and I was surprised to discover that you can even use a dryer (carefully!) to speed things along.  

I am also developing a second Variations workshop, still based on creating a series utilizing one image but changing it up based on a different set of conditions.    I will be sharing these ideas in Tampa July 16 through the 19th 2018 at Watercolor Escape.  I love developing these workshops.  I hope some of you will be able to join me!

Friday, September 1, 2017

MIXING IT UP!!

HAASTRECHT, NETHERLANDS


I am usually not inspired to paint landscapes except when I travel.  This was a scene  from our boat trip on the waterways from Amsterdam to Brugge earlier this summer.  Nice that the camera records where you are when you take the shot,  otherwise I wouldn't know this was from the village of Haastecht, which is very near Gouda.  The long, narrow canvas was a challenge.  I had to create a more simplified and interesting foreground than in the photo.   I also enjoyed the challenge of mixing various greens.   Mixing it up by using a different canvas proportion, different perspective and unexpected greens created a personal vision for a landscape.

There are at least two other paintings underneath this one.  I lose track sometimes as to what lies beneath!  Nice to finally feel satisfied and I can move on.  Eventually they all find a satisfying finished painting, but lots and lots of false starts.  The build up does make for an interesting surface.  This one has a coat of gesso that I used a sponge roller over the top.  When it dried, it had a very rough finish.  Paint scumbles beautifully on this surface but it chews up brushes so don't use good sable on this type of surface.

With every painting, I try to learn something new.   I explored surface and color mixing and think I have added to my ongoing attempt to master painting in acrylic. How boring it would be to know it all.    Fortunately, there is always something new to learn.  

Monday, August 28, 2017

EMBRACING THE DIGITAL DIVIDE!!

ZEN BRUSH APP
So many artists of my generation are not embracing the new technology at their fingertips With all the incredible digital programs available for phones and tablets from altering photos to drawing and painting digitally, it is a treasure chest of new ideas and ways of creating from combining traditional methods with digital to working completely digitally.  Staying current with technology is fabulous for keeping one's mind and spirit young and functioning optimally.  Although I prefer actually manipulating art materials, it has been so much fun learning how to manipulate digital art as well.  Especially at night while I am relaxing in a chair or waiting in the airport, doctor's office and other sit around and wait times.  It has become my new "sketch book" an artist is encouraged to have with them at all times.


I have learned how to work with these programs on my own with out any instruction.  That is, until a few weekends ago when I had the wonderful opportunity to take a 2 day seminar on various digital programs as well as information on printing, marketing and everything digital.  mDAC sponsored the weekend program and it was fabulous.  I loved meeting others who are really embracing this brave new world and learning how to go deeper into these programs.     Here are some of the new digital images I created at the seminar and since.  My goal is to do a digital drawing or painting everynight while I veg out in my comfy arm chair.


ZEN BRUSH

We started the portrait party by Julia Kay, by drawing with our nose!!!  It was a great ice breaker.   One can't help but laugh after realizing she wasn't kidding.  
Vector brush i Sketch Club app

Vector Brush in Sketch Club app
Next we played with the app Sketch Club and used the vector brush.  This creates shapes.  Challenges but quite fun to play with.  I need  to go back and explore  this app much more!

here is a portrait another artist did of me and shared using the vector brush.   

We didn't have a lot of time for our portrait party but here is another brush we played with Sketch Club. It is procedural Dots 
ZEN BRUSH APP

ADD A DIGITAL BACKGROUND

KEEP ON PLAYING!


SKETCH CLUB TEXT BRUSH

text brush from Sketch Club worked over photograph that has been modified in iColorama.

I hope these examples tempt you to explore digital painting for yourself.  Please share your images!

Sunday, August 6, 2017

TRAVEL MEMORIES

ALONG THE CANALS FROM AMSTERDAM TO BRUGGE


As most of you know, I rarely do landscape paintings.  The exceptions are usually related to traveling.  Painting is the most wonderful way to revisit trips creating an indelible memory.   This past June, I had the unusual opportunity to travel along the waterways between Amsterdam and the seaport of ZeeBrugge on a 35 foot sport boat.  It was a beautiful experience and I took tons of photos.  I thought I would be painting while cruising but that turned out to be impractical.   I am now in the process of turning some of those images into paintings.  This is the first one I have completed.   Taking photos from the docks provided a lower vantage point than normal, giving a different perspective to the landscape.  I liked shooting through the vegetation.   This  particular scene doesn't seem to be typical of what we think of Belgium or Holland but it brings back special memories for me.  

Sunday, July 30, 2017

THE PROCESS


For me, it starts with a photograph, usually of a person.  I had found a clever little gadget called a PODO which acts like a selfie stick without the stick.  It is a small square lens that can be attached to any surface by a sticky pad on the device.  It connects by blue tooth to your phone.   This allows me to shoot photos at unusual angles and create perspective distortion which I find fun to paint.  I was sitting at a desk at an art exhibit for the day and decided to play with my new "toy".   I stuck the PODO at a low angle on the desk leg and set my phone on the floor in front of me so I could see what the lens was picking up.   Here is one of the photos I took that day.

I straightened the image, cropped the photo and eliminated the background.  

Then, I digitally created a line drawing using Procreate 


This is a painting I wanted to paint over.  I was hoping to save the circle patterns in the background.


I covered the face with turquoise acrylic,  had fun spritzing with water and alcohol and then turned it upside down to disguise the image underneath.


Using my line drawing as a guide, I drew the new image onto the paper and proceeded to establish a value pattern.


Adding color but it is beginning to look too much like a cartoon  but I press on!


Not at all happy at this point. Along with many other problems,  I decided that the hands were too small for the head.   Start over by  covering with gesso and redraw the image.  


I might have over exaggerated the hands this time.  I photographed the painting and then put it into my favorite app where I could overlay my current painting with my digital drawing and save the blend.  Now I have a guide to correct the drawing!


Hands are definitely way off but very impressed with how close I got the face drawing freehand.


Okay, drawing corrected.  I was surprised the original watercolor drawing wouldn't wipe off of the gesso but it will wind up being covered with acrylic anyway, so a distraction but not a problem.


Back to establishing values.


Having fun scumbling color.


In the end I painted out the white pants and put several more thin coats of color on the background.  Only thing left of the original painting is faint circles hinting of what is buried underneath.  


Related Posts with Thumbnails